I finished LOAD today! 28 days and 31 layouts! Hooray! As well as :( I can't believe it's over, and can hardly wait for May already. Though I might actually get some housework done between now and then.
Here is my page for today:


Here is my page for today:

Do you like it? Well there is a way to create these ripples in Adobe Photoshop Elements. And here's how I did it:
1. In a new document open the elliptical marquee tool.

2. Once you have decided where to put the center ripple click there and hold the shift key while you drag your mouse to make a small circle.

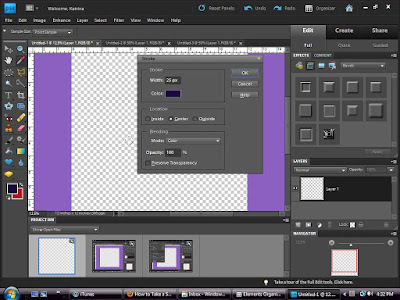
3. Stroke/outline selection. I used 25 pixles for the center.


4. Repeat steps 2 & 3 several times making progressively larger circles, varying the stroke size and the space between circles. (Hint if you can't get the circle where you want it create a new layer just for that circle, then you can nudge it where you want it and merge the layers)
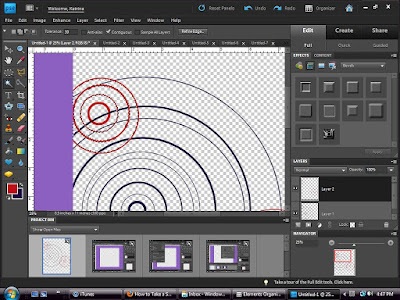
5. When your first set of ripples is as large as you want it, create a new layer and make a new center circle away from the first center. (I changed colors to make it easier to see.)
6. Make another smaller set of ripples using steps 2 & 3 again

7. Make as many additional ripples as you want.
8. When you have all the ripple circles you want, use the magic wand tool to select between each circle of the secondary ripples (make sure "Add to Selection" is highlighted).

9. Select the layer with your first set of ripples and hit delete on the keyboard. This will delete rings between the secondary ripples.

10. Deselect.
11. Right click on the top layer in the layer pallet. Merge the two layers together so that they become one layer. (Merge Down)
12. In the Layer Styles bin select Bevels and Simple Emboss Apply to the layer.

13. Select the digital paper you want to have ripples on. (I chose to use a solid color for this demonstration) Add the paper in a new layer on top of the ripples layer.

14. When you have the paper where you want it create a duplicate of the paper layer.

15. Move one of the paper layers to the back.

16. Make sure you have selected the top paper layer. In the Layers menu click on create clipping mask (or you can press control & G at the same time on the clipboard)

Voila you have ripples!


I hope you like this. Please let me know if you try it and share any projects you make. (And if there are any important screen shots I missed, I've never done a tutorial before)
Thanks!
Oh By the way, join me tomorrow in the One Little Word Blog Hop- Starting at 8am Pacific Time (11 Eastern time) with Margie here: http://xnomads.typepad.com.
It should be a lot of fun and there will probably be some giveaways. I'm super excited! Hope to see you there!
No comments:
Post a Comment